3. Create First Repo#
Let’s assume you are working in a private project. You will need to first create your repository on GitHub. For this:
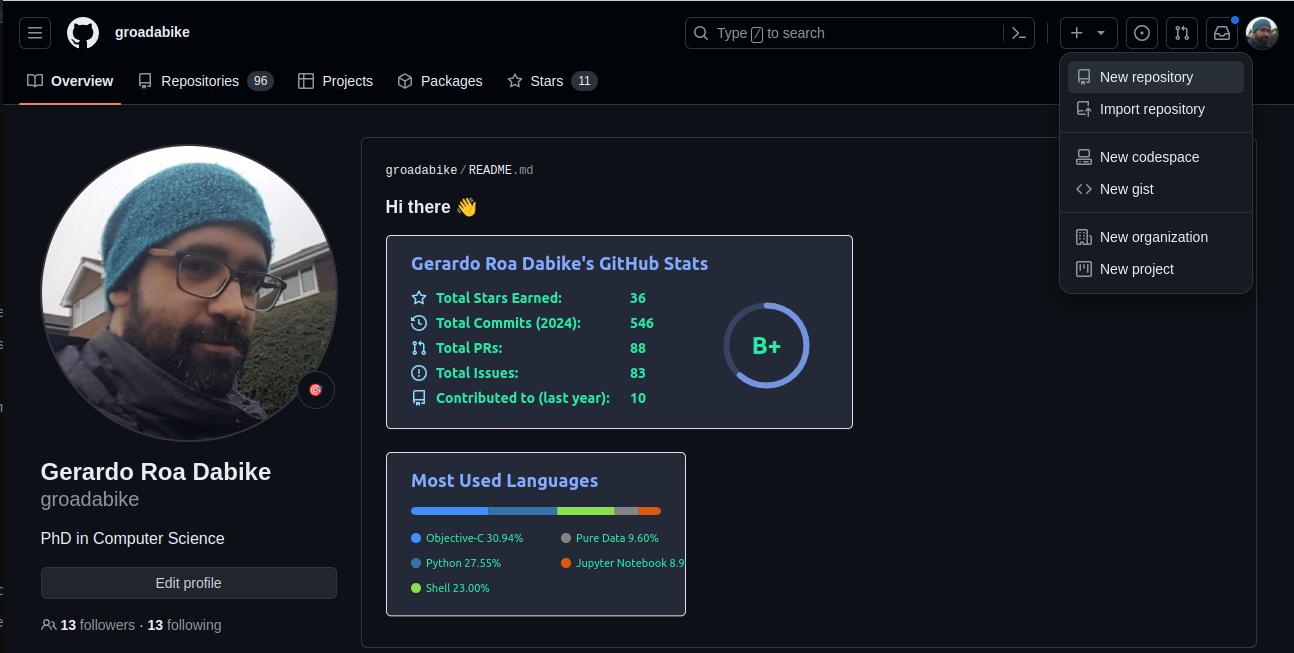
If you are not already logged in, go to GitHub and log in.
Click on the
+sign in the top right corner and selectNew repository.
Fill in the repository name, description, and select if you want it to be public or private. Then click on
Create repository. Other options are available, but for now, we will keep it simple.
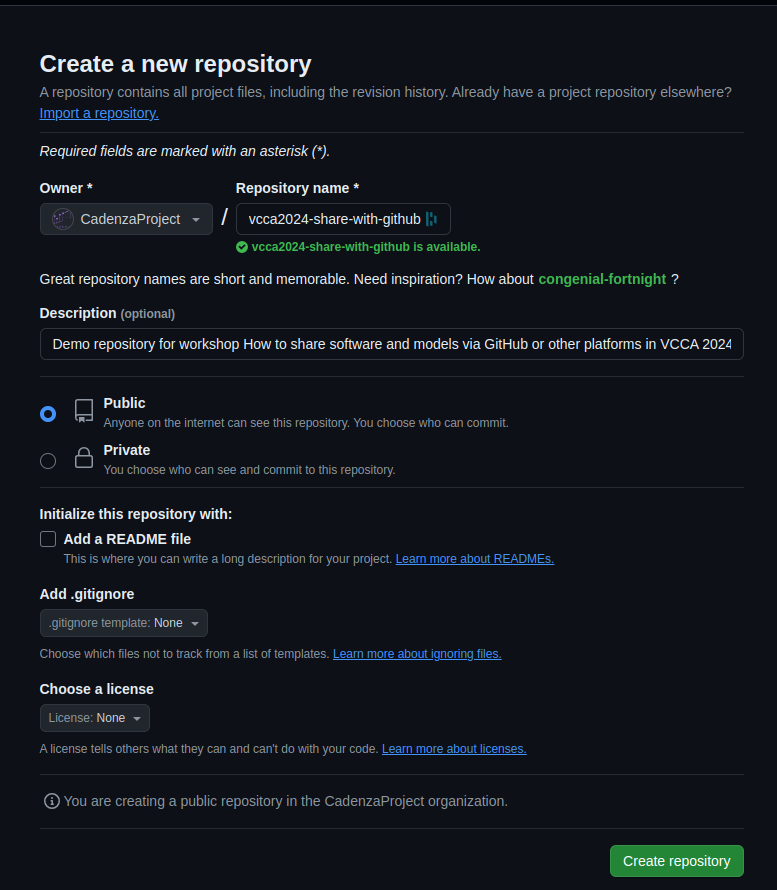
The description is optional, but it helps others better understand what the repository is about So, it is a good practice to add one or two sentences describing the content/objective of the repository.
If later you want to share your repository with others, you can change it to public.
Example:
I created a repository named vcca2024-share-with-github.
The description is Repository for sharing code and files with the VCCA 2024 workshop participants.
And, I selected the repository to be public.
Note
If you are part of a project, you might want to create a repository under the organization.
For this, you will need to select the organization in the Owner field.
In the example, I selected CadenzaProject as owner, this means that the repository will be created under the organization
CadenzaProject.
Additionally, you can initialize (which is a good practice) the repository with a README file, a .gitignore file, and a license. I’m skipping these steps for now to keep it simple, but I highly recommend initializing the repository with these files. More information about these options is available in the GitHub documentation.
README.md file
It provides an introduction and overview of your project. It should help visitors and collaborators understand what your project does, how to install it, and how to use it.
.gitignore file
It specifies files and directories that Git should ignore (not track) in your project. It helps prevent committing files like editor-specific settings, compiled files, and sensitive information (e.g., API keys) to your repository.
LICENSE file
It specifies the terms under which others can use, modify, and distribute your code, protecting your intellectual property rights and clarifies the legal obligations for users and contributors.
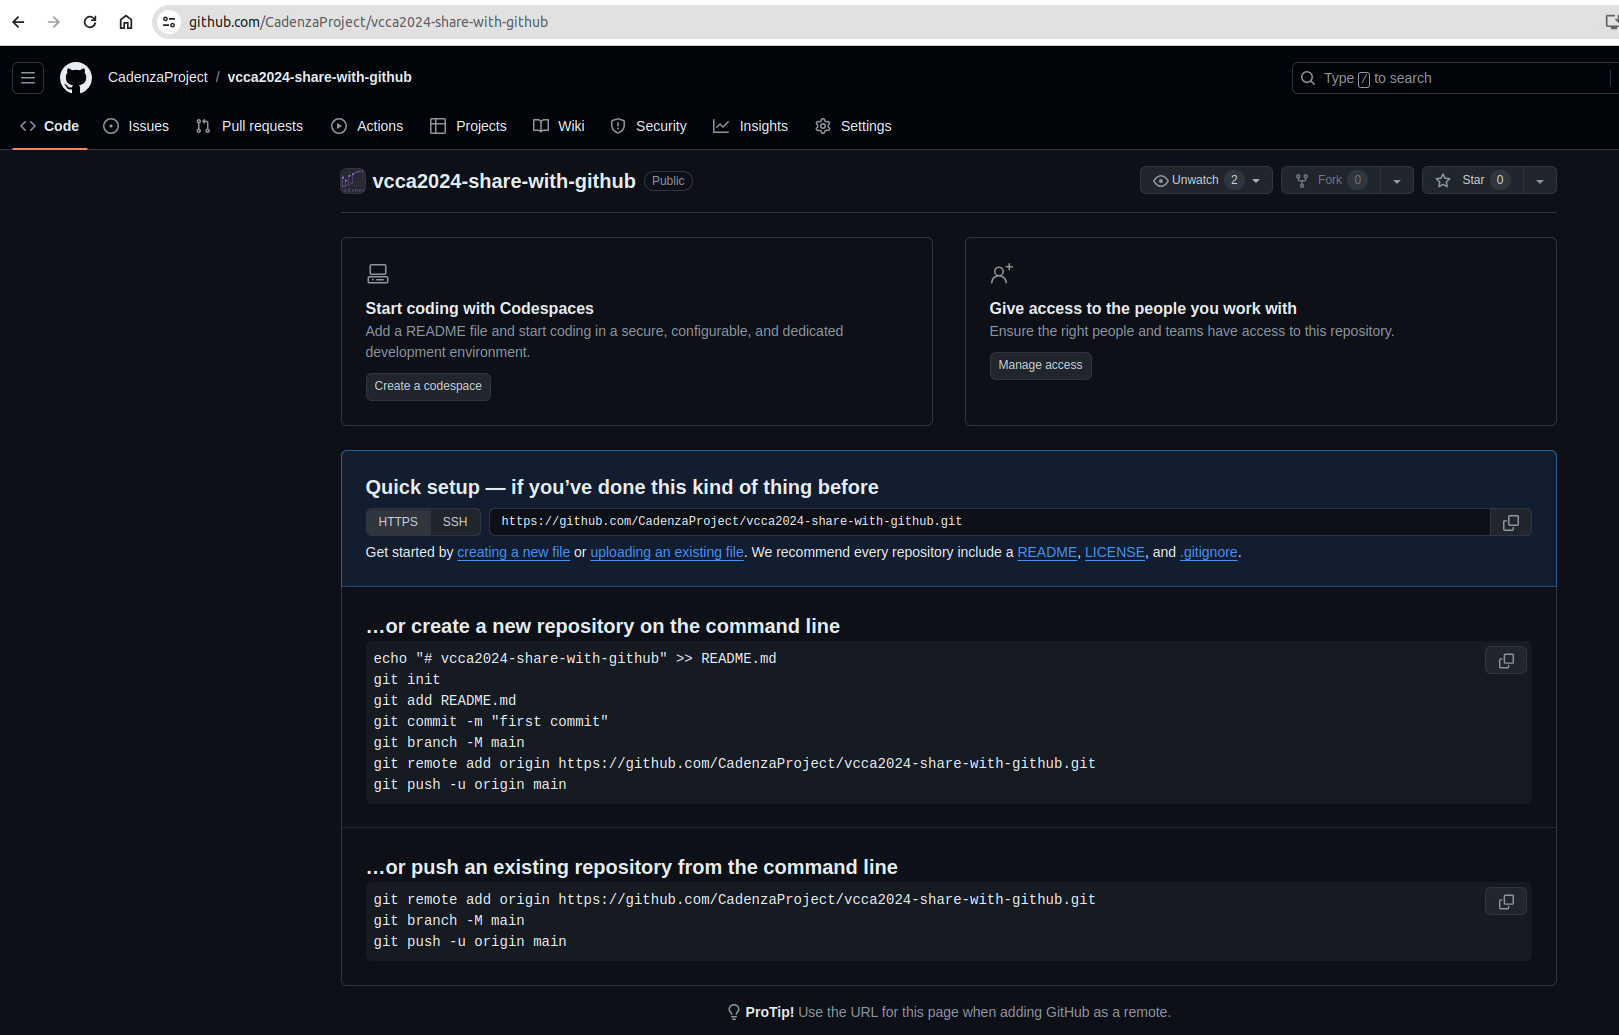
Once the repository is created, you will see the repository page. You can see the URL of the repository in the address bar of your browser. Note that the repo URL is made of three parts:
https://github.com/<username>/<repository name>:
https://github.com: the base URL of GitHub.username: your GitHub username.repository-name: the name of the repository.
3.1. Making changes to your repo#
After a repository has been created, you can make changes to it like changing the repo name, description, adding files, etc.
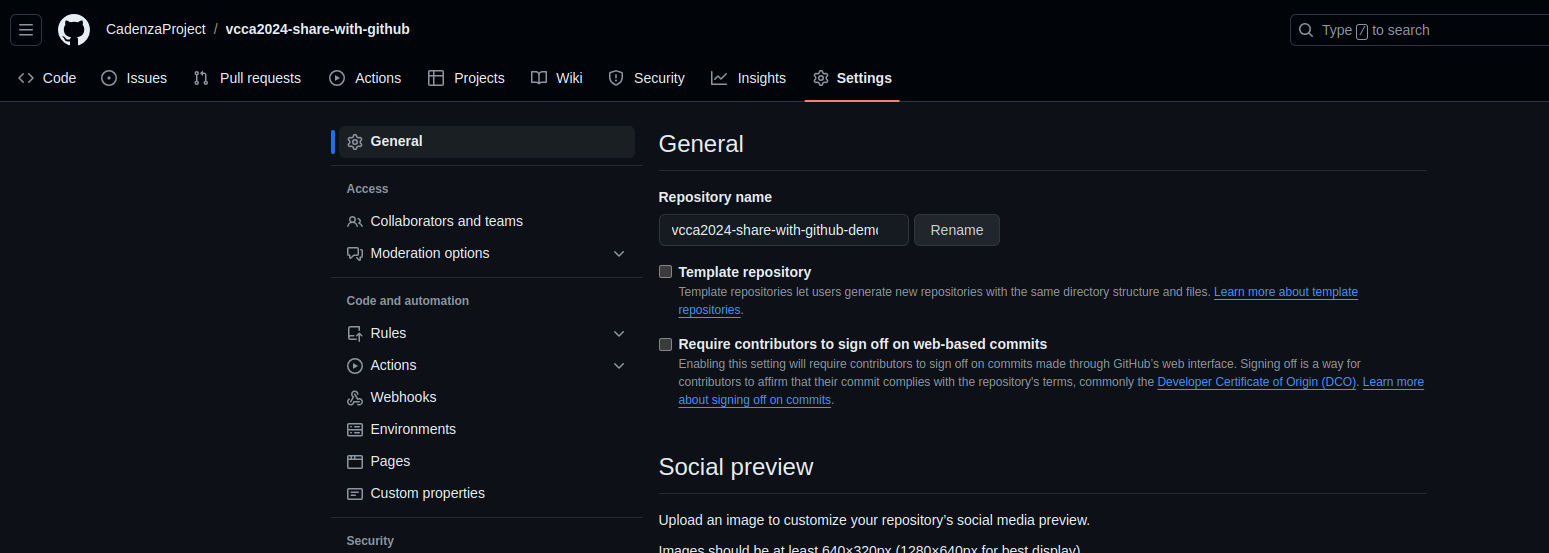
3.1.1. Change Name#
To change the name of the repository:
Go to the repository page.
Click on the
Settingstab.In the
Repository namefield, change the name of the repository.Click on
Rename.
Example:
I am changing the name vcca2024-share-with-github to vcca2024-share-with-github-demo.